

Clatterteeth Canyon offers a jaw dropping adventure through some of the most spectacular scenery the Blue Mountains has to offer. With crystal clear creeks that shine emerald and even electric blue in the sunshine and long narrow slots that feel like you’re entering another world. It’s a ‘hike’ that you’re likely to be dreaming about long after you finish it.
Some of the canyon swims were so magical I wanted to freeze time and do them again and again.
Though Clatterteeth Canyon doesn’t have any technical sections and no abseiling is required, it’s a long day with plenty of lengthy swims. It’s a truly special place, but you need to have the right conditions and gear before taking it on.
Here’s everything you need to know about Clatterteeth Canyon.

What’s involved in visiting Clatterteeth Canyon
What to expect on the non-abseiling route
There are two ways of doing this canyon: one involves abseiling/rope work and one doesn’t. Having never done the abseil route we can only talk about the hike, but if you do abseil then you can knock some of the distance off the stats we’ll mention below.
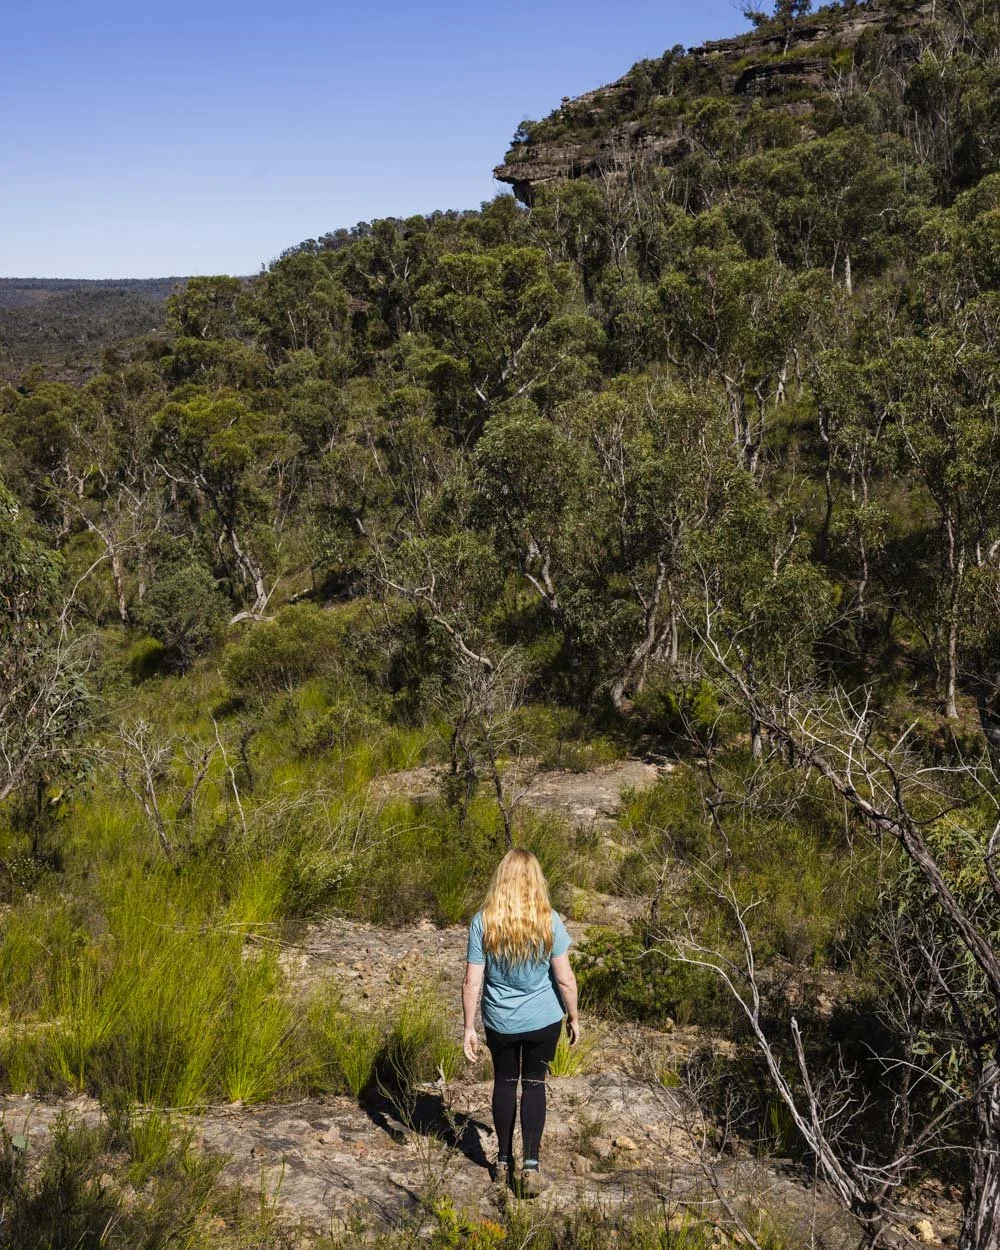
To access the canyon without abseiling you’ll need to walk to a creek which feeds into a second creek before reaching the canyon. The bushwalk is straightforward and easy enough.
The first part of the creek walk has some debris and short eroded sections and the path is not always defIned. It’s not hard as such, but you need to be comfortable with offtrack walking. To get into October Creek (the second creek that leads into the canyon) involves a scramble.

The entry to the first creek

The drop into October Creek
Lots of wading, swimming and some scrambling
From here you’ll be wading and occasionally swimming through some open canyon and a couple of short narrow slots. Inbetween there is plenty of dense scrub to get through which slows you down.
When you reach the canyon things get even more beautiful and there is now much more swimming, including some long swims I would estimate to be well over 100m.
You may want a lilo for this, though carrying a lilo through the debris and over boulders is tedious. I preferred to swim, but I enjoy long swims, if you don’t, you will definitely want some kind of floatation device.
Inside the canyon there is still significant sections which involve wading through debris, as well as several cascades to climb and some scrambling.

Exiting the canyon
You have two options when it comes to exiting the canyon. You will arrive first at the turning into Joe’s Canyon and this is by far your quickest exit point. We’ve covered this track in detail in the linked guide.
An alternative, but much longer and more challenging option, is to continue along Du Faur Creek to Bell Creek and exit at the Wollangambe.
We’ve covered that route in this guide. Personally we exited at Joe’s Canyon and I think that’s going to be the preference for most people.

A stunning section of Bell Creek
Safety info
Make sure you have some experience
Firstly, I would not recommend this as your first wet canyon hike. It is significantly longer than the Joe’s Canyon loop, which is an excellent one to start with (but even then, I would recommend having some offtrack hiking experience).
Though they are similar in nature, Joe’s Canyon is significantly easier and it makes sense to see what you think of that one first - it’s also exceptionally beautiful. You could also try the offtrack section of the Grand Canyon which is again much easier than Clatterteeth.
There are parts of Clatterteeth that would be hard to reverse when you’ve started, so you want to feel confident you can complete the canyon before setting off.

Weather & wetsuits
To complete the hike safely you need a dry day where no rain is predicted and you don’t want there to have been recent heavy rains or the water levels will be up in the creeks, making the going much tougher. Very high water levels can be dangerous.
Ideally you want to pick a nice sunny day to help keep warm and it doesn’t hurt that the water colour will be especially beautiful in the sunshine.
The water can be very cold, I did about half the canyon without a wetsuit, but was glad to use one later on and that’s a rarity for me.
Although by my standards the water was not exceptionally cold, it’s the amount of time you are in the water that makes carrying a wetsuit with you mandatory. Granted we didn’t go on a hot day (24C) but even so, I think not having a wetsuit with you on this one is a risk.

There are many long swims and even on a sunny day oftentimes the canyon walls block the sun. It’s simply not worth the risk. The worst that can happen if you don’t need the wetsuit is that you carried it for nothing, the worst if you don’t have it is hypothermia.
Joe used a wetsuit throughout and found it far more enjoyable than when he didn’t in the Grand Canyon.
Bring the right safety equipment
As always, make sure people know of your plans - tell them where you’re heading and the route. There will be limited to no phone signal along the route, so we highly recommend carrying a PLB. This canyon sees very low footfall, so if something goes wrong you need to be able to call for help and not rely on anyone passing by.
You should also have a physical map or offline map with you and a way of charging your device if you run out of battery.
Allow plenty of time
A trip to Clatterteeth Canyon will be a long day for most people. We recommend starting early to allow plenty of time. The scenery is incredible and the terrain sometimes very slow due to debris, so you don’t want to feel rushed. Most people will take somewhere between 7 - 10 hours to complete the canyon, especially if you like stopping to take lots of photos etc.
Now that we’ve got the logistics out the way, it’s time to show you why this is one of the best canyon trips we’ve done yet!
Clatterteeth Canyon - the route
The stats
Distance: Approximately 13km loop (exiting at Joe’s Canyon)
Elevation gain: 450m
Difficulty: Hard and strenuous (but not technical)
Trailhead: Mt Wilson Fire Station Car Park
It’s worth noting the above stats are a guideline only. Inside the creeks our Apple watch and GPX struggled to accurately plot our route and therefore the stats are not as accurate as we normally provide for standard hikes.
However, using the data we collected from this trip, previous trips to Joe’s Canyon and other information, we believe that the loop is about 13km long….. a very slow 13km.
The walk in
Distance to creek one: 3.1km
As with many canyons in the area, the walk begins from the Mount Wilson Fire Station. From the car park head left along the road which leads to Du Faur Rocks.
After 250m head left around the gate and onto the Bogey Holes Fire Trail. The wide fire trail is easy to walk on and heads downhill for the first 400m.
After this there’s a brief 150m uphill climb before the path is either flat or heads gently downhill. At the 800m mark you’ll start to get some distant views out to the mountains.


Just over 1.1km into the trail it will head briefly uphill again before reaching a junction 100m later, you need to keep straight. The fire trail will get bushier and there’s now some grass covering the path.

Roughly 450m later there is much thicker bush in the middle of the track, it’s still easy to get through, but it’s far from the wide open path you started on. The track will then start descending again and just over 2km into the walk you’ll come to a junction.
You’ll see a small blue arrow but this is for another track, you need to keep right. Almost immediately afterwards the path becomes indistinct, you need to keep straight/slightly left depending on how you view it.

The path will descend and it’s still overgrown, but again it’s not difficult to pass through. You will still see a worn path to follow.
Roughly 200m later (2.2km into the walk) you’ll head down a small rocky gully. The track will briefly steepen (you’re still descending) before it gets gentler again.

Approximately 2.6km into the track it gets a little steeper and the path bears left. You’ll come to a rock slab (grippy when dry) and head down it.
The obvious path now lies to the right, but this is the trail to the abseil point. To do the non-abseiling route you need to take the indistinct track leading left instead (coordinates -33.5143649, 150.3483710 you can view it here on Google Maps).
The area where the junction is

The path heading left
Once you get on this path it’s worn and clear. There is a little bit of clay like mud here, so it can be a bit slippery, but it doesn’t last long. After a couple of hundred metres the trail will flatten.
At the 3.1km mark there is some debris, but you can keep right to avoid it. Just 50m later you’ll reach a couple of little dirt steps down into the creek (beside a pagoda). This walk in took us 50 minutes at a leisurely pace.

The first creek
Distance to October Creek: approx 300m
You’ll step down into the creek, but only for two steps before you need to head up onto the left bank. This next section doesn’t have a clear path and we did go wrong initially. You want to stick to the left bank where possible.

At first it is clear and the narrow path takes you above the creek. It’s a bit overgrown and slightly eroded in places. After 100m we got back into the creek and climbed over some debris and into an overhang. I am not sure if this was correct or if there was a way through on the left bank.
Either way if you end up at the overhang you want to cross to the left bank, it won’t look like there’s a path, or it didn’t for us, but it is there somewhere!

Keep to this narrow left trail and follow it as it undulates above the creek. It does get a bit clearer and more open partway through.
The path is not a proper trail, but a worn social track which isn’t in the best shape, but keep following it and it will eventually descend towards a rock platform with a cairn on top (co-ordinates: -33.5164422, 150.3440237 - or you can find it here on Google Maps).
This is your route down into October Creek.

This is a nice point to take a quick break if needed, and depending on your tolerance for cool water, may be the point at which you want to put on your wetsuit.
I wouldn’t inflate the lilo at this point though as there will soon be debris to get through and the long swims are still some way off.
Wading through October Creek
To get into October Creek requires a scramble. There is a small cascade which you have to slide off into the water.
Any part of the rock surface that has water on it is incredibly slippery, so unless it’s very dry, there’s no way of lowering yourself down.
You also can’t jump as the water in the creek below is not very deep (or wasn’t for us anyway) so you have to slide off.

From here you need to head right, and from now you will be in and out of the water for the rest of the way until you reach the end of Joe’s Canyon (or the Wollangambe if you’re doing the really long route).
The water in October Creek was not especially deep for the most part and only a couple of short swims were required. Mostly the water was knee height.
October Creek is beautiful and though it’s predominantly an open creek, there are several narrow slots which are glorious - though nothing on what’s to come later!

The creek has a lot of debris which makes it slow going despite the short distance. If you have a lilo with you, watch for snags and consider not inflating it until you reach Du Faur Creek Canyon to minimise your chance of popping it.


There are also several scrambles up and down small cascades and rocks inside the water to negotiate. Occasionally there will be something of a track out of the water which you can take to avoid thicker debris.
Roughly 600m into October Creek (but bear in mind our tracking was struggling greatly inside the creek) you will reach a climb down which is harder than any of the other bits so far in my opinion.

Looking at the climb down (the crack) from the other side
I’ll start by saying that Joe thought it was easy and climbed down quickly. I found it challenging. You have to climb down a bit of rock wall where there aren’t enough footholds to come down, so you have to drop into the water a little way which I always find disconcerting.

Scrambles in October Creek
Once down things continue in much the same vein until you reach a stunning bit of proper canyon.
There are a couple of narrow constrictions which last for some time. This was by far my favourite part of October Creek and a delight to swim/wade through.


About 1.2km into October Creek you’ll reach a relatively long dry section, which is rough and has some significant debris, though it wasn’t unstable.
Although we normally like to be really detailed in our notes, this is one of those hikes where there is too much going on. So hopefully this helps as a guideline on what to expect but my biggest advice is to allow more time than you think you’ll need.
Now onto the canyon.
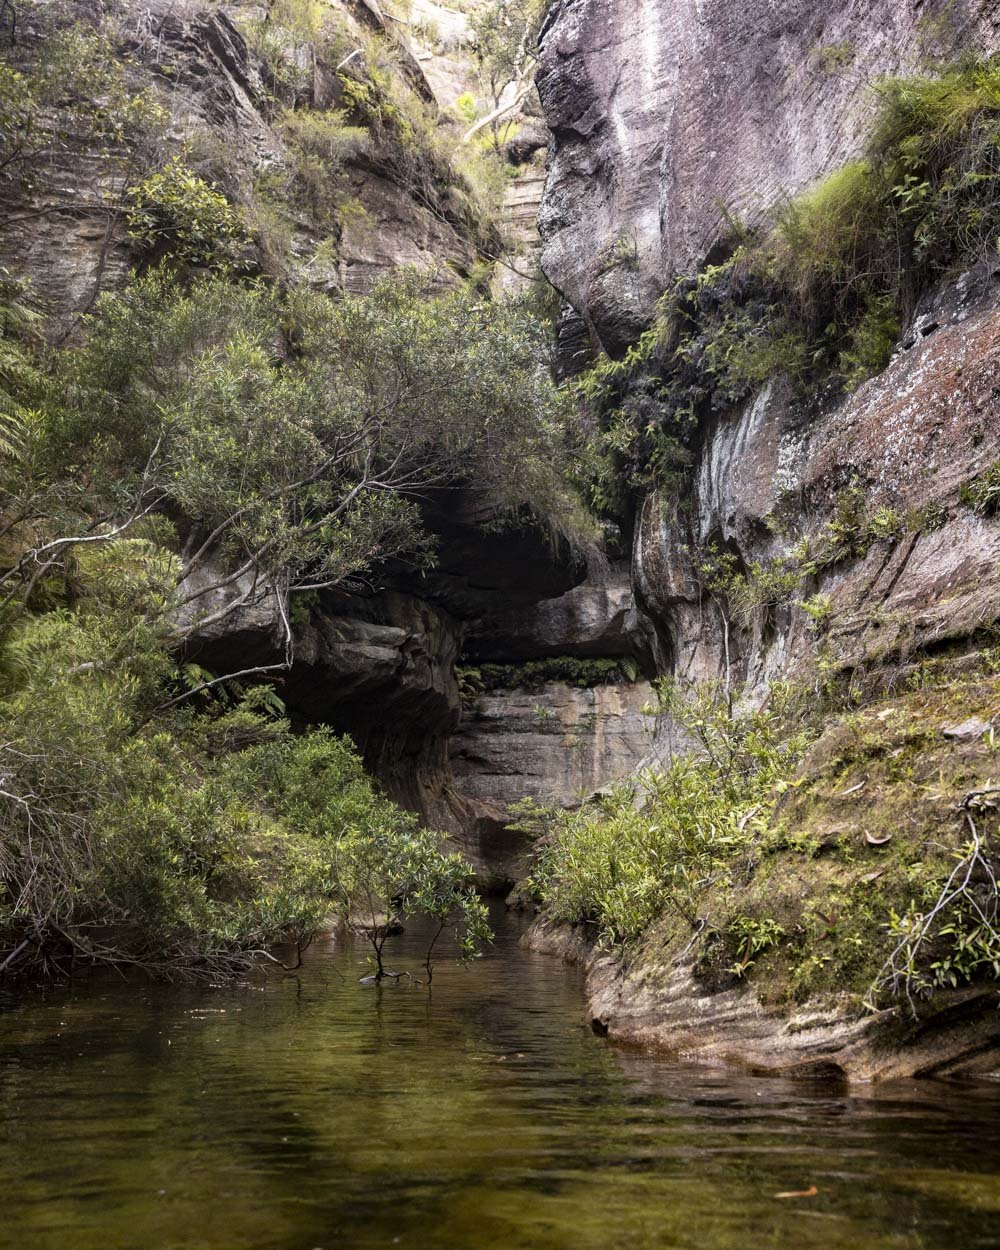
Clatterteeth Canyon (aka Du Faur Creek Canyon)
The track will bring you to a small pool within a narrow slot. Just before this is a dry rocky area where you can take a break and have some lunch if needed, it catches the sun, so it’s a nice place to relax a little.
The pool you’ll see ahead of you is simply magical and we named it the ‘bubblegum pool’ due to its intense blue colour.

This is the first of many long swims and a good place to inflate your lilo if you have one. Swimming or lilo-ing this first narrow constriction is mesmerising and it’s from here that I found the scenery absolutely jaw dropping.

There are so many long narrow slots with the most sensational water which were a joy to swim through. I defy anyone to look up at the walls above and not be in awe.
Joe isn’t a massive fan of these wet canyon hikes and even he said it was exceptional and he would like to do this section again!


The first constriction is over 100m long and then it’s only a short gap before the next begins - this is why you’ll start to see that the swimming is quite considerable. My favourite kind of canyon!
There are dry sections inbetween, some of which have significant debris again, an unfortunate theme of this adventure.
But I would say the long canyon swims inbetween are so utterly fabulous as to make all the debris worth it - plus I think the scrambling is generally easier in Clatterteeth than it was in October Creek, which is another win. There are still cascades, rocks and some squeezes, but after October Creek I personally found it easier.

Roughly 500m in you’ll have some boulders to get over, but it’s not too challenging. You’ll pass into a shallow section of canyon which reminded me a lot of the Grand Canyon, dark and mysterious.


You’ll then have many long swims through spectacular narrow constrictions before hitting some bad debris. After battling through there are more constrictions with a mix of swimming and shallower wading involved. It’s otherworldly and feels completely wild.


Inbetween swims you’ll have more creek walking, some open and easy and some with debris. A few short swims in pools that would be worthy destinations in their own right follow until you eventually come to the intersection with Joe’s Canyon.

Most people will exit here, though the really ambitious could continue down Du Faur Creek into Bell Creek and exit at Horseshoe Bend on the Wollangambe. I won’t cover that here because we have an article covering that exact route from an earlier trip.
Exiting via Joe’s Canyon
Distance to Mount Wilson Fire Station: 3.25km
Joe’s Canyon makes for an easy exit route with no technical terrain to cover, it’s also an absolutely stunning slot canyon and relatively dry.
There’s a very minor scramble as you leave the water to get up onto the bush track, but it’s just a couple of steps and not challenging.


You’ll walk briefly on a worn trail through what feels more like bushland than canyon before you can either squeeze through the gap between the wall and the giant rocks ahead of you, or bypass it by heading right, which offers a wider route, but has a little pool to cross.

You then enter the most spectacular part of the canyon, the narrow slot. The canyon walls are huge here and beautifully sculpted. The water is generally knee deep or lower, so it’s very easy to walk through the 50m slot.

As you exit the canyon you have a little more creek walking to go before you hit the defined trail back to the fire station.
You’ll predominantly walk through the creek itself, but due to obstructions in the water, sometimes it is easier to walk on the river banks - it’s always obvious where to do this.
In total you have just 300m through the creek before you reach the walking track, but it can feel a little longer due to the nature of the terrain.


Once you reach the end of the creek it’s an easy couple of steps up onto the walking track, and now all that’s left to do is the climb! It is quite a hefty one after a long day in the canyon, but it’s a pretty walk with some great views along the first half.

The path is in excellent condition, a mix of dirt track and well maintained stairs at first and then a narrower slightly more overgrown bush track, followed by fire trail.
Though part of the bush track is overgrown, it’s always easy to follow, it’s well worn due to the fact it’s the route down to the most popular part of the Wollangambe River.

There are a few flat sections along the trail, but for the most part it’s a climb. After exiting the creek you will quickly see a signpost and from here it is signposted at every turn you need to make back to the fire station again. We have more pictures and detail on this part of the track in our detailed Joe’s Canyon guide.
You will then have completed one of the most incredible non technical canyon hikes in the Blue Mountains. However, as mentioned, if you haven’t done a walk like this before please check out the Joe’s Canyon loop first as this is easier (and less committing) and will give you a taste of what Clatterteeth is like.
Keep them wild
Please remember to take all rubbish with you and keep these places wild and pristine - as with anywhere in the outdoors. It’s important to leave them exactly as you found them so they will remain beautiful for generations to come.
Litter tends to breed litter, so if you do spot any and are able to pick it up and dispose of it outside the national park, it will go a long way to keeping the area clean.
Getting to the trailhead for Clatterteeth Canyon
The walk to Clatterteeth Canyon begins at the Wollangambe parking area opposite the Fire Station in Mount Wilson. You’ll find plenty of free parking in the designated car park. It’s around 40km and a 40 minute drive from Katoomba, 32km and a 30 minute drive from Bilpin and 122km and a 2 hour drive from Sydney.
There is a public toilet at the fire station, but nowhere else along the trail, please plan accordingly.
This post may contain affiliate links, meaning at no additional cost to you, that we will earn a small commission if you click through and decide to make a purchase. This helps towards the costs of running our website. Thanks for your support.


